Appearance
canvas
基础知识
Canvas 是用使用 JS 画布的思想来绘制图形,下面通过一些示例掌握 Canvas 的使用

项目模板
以下示例因为使用到了 Typescript,所以我们使用 vite 创建 typescript 项目,并选择使用 vanilla 模板来开发
$ yarn create vite项目安装执行结果
执行结果
✔ Project name: … aaa
✔ Select a framework: › vanilla
✔ Select a variant: › vanilla-ts
目录结构
├── images				 		//图片文件
│   └── p2.jpeg
├── index.html				//项目模板文件
├── package.json			//项目配置文件
├── src
│   ├── main.ts				//项目主文件,我们在这里编码
│   ├── style.css			//公共样式
│   └── vite-env.d.ts	//TS类型声明文件
├── tsconfig.json			//TS配置文件
└── yarn.lock					//扩展包版本锁定文件
矩形绘制
下面来学习使用 strokeRect 方法绘制边框矩形
实心矩形
使用 fillRect 方法可以绘制实心矩形,下面是 fillRect 方法的参数说明
| 参数 | 说明 |
|---|---|
| x | 矩形左上角的 x 坐标 |
| y | 矩形左上角的 y 坐标 |
| width | 矩形的宽度,以像素计 |
| height | 矩形的高度,以像素计 |
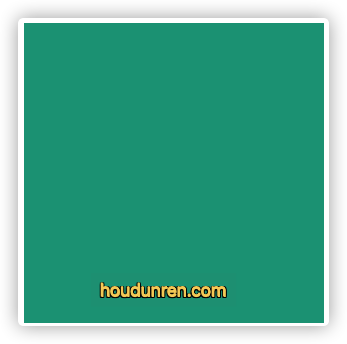
下面使用纯色填充画布
<!-- 画布元素 -->
<canvas id="canvas" width="500" height="500">
	您的浏览器不支持 HTML5 canvas
</canvas>
<script>
    const el = document.getElementById('canvas')
    //画布对象
    const app = el.getContext('2d')
    //定义填充颜色
    app.fillStyle = '#16a085'
    //绘制矩形
    app.fillRect(0, 0, 500, 500)
</script>
空心矩形
使用 strokeRect 方法可以绘制空心矩形,下面是 strokeRect 方法的参数说明
| 参数 | 说明 |
|---|---|
| x | 矩形左上角的 x 坐标 |
| y | 矩形左上角的 y 坐标 |
| width | 矩形的宽度,以像素计 |
| height | 矩形的高度,以像素计 |
下面绘制实线边框的示例代码

<canvas id="canvas" width="500" height="500"> 您的浏览器不支持 HTML5 canvas </canvas>
<script>
    const el = document.getElementById('canvas')
    //画布对象
    const ctx = el.getContext('2d')
    //定义填充颜色
    ctx.strokeStyle = '#16a085'
    //线条宽度
    ctx.lineWidth = 30
    //边角类型:bevel斜角 ,round圆角,miter尖角
    ctx.lineJoin = 'round'
    //绘制矩形边框
    ctx.strokeRect(50, 50, 300, 300)
</script>
圆形绘制
使用 canvas 可以绘制圆形
arc
下面是绘制圆方法 arc 的参数说明
| 参数 | 说明 |
|---|---|
| x | 圆的中心的 x 坐标。 |
| y | 圆的中心的 y 坐标。 |
| r | 圆的半径。 |
| sAngle | 起始角,以弧度计。(弧的圆形的三点钟位置是 0 度)。 |
| eAngle | 结束角,以弧度计。 |
| counterclockwise | 可选。规定应该逆时针还是顺时针绘图。False = 顺时针,true = 逆时针。 |
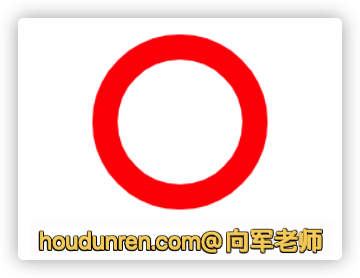
绘制空心圆
<div class="app">
    <canvas id="canvas" width="500" height="500"></canvas>
</div>

<script>
    const el = document.querySelector('canvas')
    const ctx = el.getContext('2d')
    //填充画布颜色
    ctx.beginPath()
    ctx.strokeStyle = 'red'
    ctx.lineWidth = 20
    ctx.arc(100, 100, 60, 0, 2 * Math.PI)
    ctx.stroke()
</script>
<div class="app"></div>
绘制实心圆
下面来掌握使用 canvas 绘制填充圆,绘制圆使用 arc 函数,具体参数说明参考上例。

<div class="app">
    <canvas id="canvas" width="500" height="500"></canvas>
</div>

<script>
    const el = document.querySelector('canvas')
    const ctx = el.getContext('2d')
    //填充画布颜色
    ctx.beginPath()
    ctx.fillStyle = '#f1c40f'
    ctx.lineWidth = 20
    ctx.arc(100, 100, 60, 0, 2 * Math.PI)
    ctx.fill()
</script>
<div class="app"></div>
节点绘制
我们可以通过以下方法定义不同节点、线条样式来绘制图形
- beginPath() 重置绘制路径
- lineTo() 开始绘制线条
- moveTo() 把路径移动到画布中的指定点,但不会创建线条(lineTo 方法会绘制线条)
- closePath() 闭合线条绘制,即当前点连接到线条开始绘制点
- lineWidth 线条宽度
- strokeStyle 线条的样式,可以是颜色 、渐变
- stroke() 根据上面方法定义的节点绘制出线条
绘制多边形
下面是根据节点来绘制三角形图形

<!DOCTYPE html>
<html lang="en">
    <head>
        <meta charset="UTF-8" />
        <meta http-equiv="X-UA-Compatible" content="IE=edge" />
        <meta name="viewport" content="width=device-width, initial-scale=1.0" />

        <style>
            * {
                margin: 0;
                padding: 0;
                box-sizing: border-box;
            }
            body {
                display: flex;
                width: 100vw;
                height: 100vh;
                justify-content: center;
                align-items: center;
            }
            app {
                display: flex;
                flex-direction: column;
            }
        </style>
    </head>
    <body>
        <div class="app">
            <canvas id="canvas" width="400" height="400"></canvas>
        </div>

        <script>
            const el = document.querySelector('canvas')
            const ctx = el.getContext('2d')
            //填充画布颜色
            ctx.fillStyle = '#8e44ad'
            ctx.fillRect(0, 0, el.width, el.height)
            //开始画线
            ctx.beginPath()
            //移动起始点
            ctx.moveTo(200, 0)
            //下一个节点
            ctx.lineTo(400, 200)
            //下一个节点
            ctx.lineTo(0, 200)
            //闭合节点
            ctx.closePath()
            //线宽
            ctx.lineWidth = 10
            //线颜色
            ctx.strokeStyle = '#f1c40f'
            //画线
            ctx.stroke()
        </script>
        <div class="app"></div>

        <script type="module">
            import main from './main.js'
        </script>
    </body>
</html>
线性渐变
使用 canvas 的 createLinearGradient() 方法可以创建线性的渐变对象,用于实现线性渐变效果。
createLinearGradient
下面是 createLinearGradient 线性渐变的参数
| 参数 | 描述 |
|---|---|
| x0 | 渐变开始点的 x 坐标 |
| y0 | 渐变开始点的 y 坐标 |
| x1 | 渐变结束点的 x 坐标 |
| y1 | 渐变结束点的 y 坐标 |
渐变边框
下面是绘制激变的边框的效果

<!-- 画布元素 -->
<canvas id="canvas" width="500" height="500"></canvas>
<script>
const el = document.getElementById('canvas')
//画布对象
const ctx = el.getContext('2d')
//定义渐变的开始与结束坐标
const gradient = ctx.createLinearGradient(0, 0, 500, 500)
// 定义渐变位置与颜色,参数一为位置是从 0~1 之间,参数二为激变颜色
gradient.addColorStop(0, '#1abc9c')
gradient.addColorStop(0.5, '#9b59b6')
gradient.addColorStop(1, '#f1c40f')
//渐变填充
ctx.strokeStyle = gradient
//设置线的宽度
ctx.lineWidth = 20
//绘制线条矩形
ctx.strokeRect(100, 100, 300, 300)
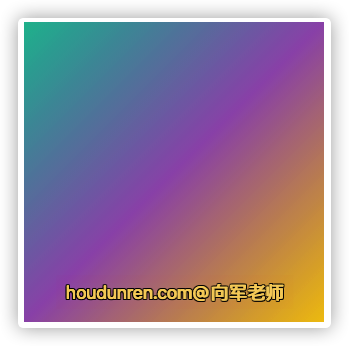
</script>渐变填充
渐变也可以用于填充
<!-- 画布元素 -->
<canvas id="canvas" width="500" height="500"> 您的浏览器不支持 HTML5 canvas </canvas>
<script>
const el = document.getElementById('canvas')
//画布对象
const ctx = el.getContext('2d')
const gradient = ctx.createLinearGradient(0, 0, 500, 500)
// 定义渐变位置与颜色,参数一为位置是从 0~1 之间,参数二为激变颜色
gradient.addColorStop(0, '#1abc9c')
gradient.addColorStop(0.5, '#9b59b6')
gradient.addColorStop(1, '#f1c40f')
//定义填充颜色
ctx.fillStyle = gradient
//绘制矩形
ctx.fillRect(0, 0, 500, 500)
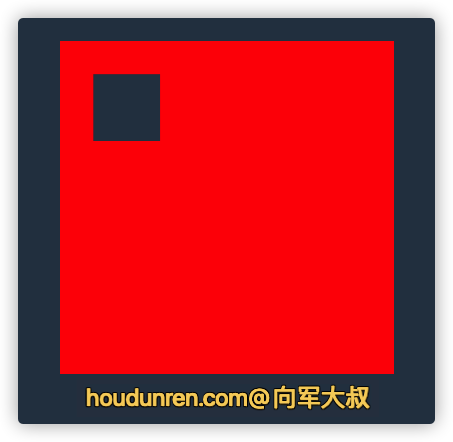
</script>清空区域
下面是将红色画布上清除一块区域,清除后的内容是透明的。
<canvas id="app" width="500" height="500"></canvas>
<script>
    const canvas = document.getElementById('app').getContext('2d')

    canvas.fillStyle = 'red'
    canvas.fillRect(0, 0, 500, 500)
		//清除矩形区域
    canvas.clearRect(50, 50, 100, 100)
</script>
填充文字
下面掌握使用 canvas 的 fillText 方法绘制填充文字
fillText
下面是 fillText 方法的参数
| 参数 | 描述 |
|---|---|
| text | 规定在画布上输出的文本。 |
| x | 开始绘制文本的 x 坐标位置(相对于画布)。 |
| y | 开始绘制文本的 y 坐标位置(相对于画布)。 |
| maxWidth | 可选。允许的最大文本宽度,以像素计。 |
textBaseline
textBaseline 用于定义文字基线
| 参数 | 说明 |
|---|---|
| alphabetic | 默认。文本基线是普通的字母基线。 |
| top | 文本基线是 em 方框的顶端。。 |
| hanging | 文本基线是悬挂基线。 |
| middle | 文本基线是 em 方框的正中。 |
| ideographic | 文本基线是表意基线。 |
| bottom | 文本基线是 em 方框的底端。 |
textAlign
textAlign 用于文本的对齐方式的属性
| 参数 | 说明 |
|---|---|
| left | 文本左对齐 |
| right | 文本右对齐 |
| center | 文本居中对齐 |
| start | 文本对齐界线开始的地方 (左对齐指本地从左向右,右对齐指本地从右向左) |
| end | 文本对齐界线结束的地方 (左对齐指本地从左向右,右对齐指本地从右向左) |
示例代码

<canvas id="canvas" width="500" height="500"></canvas>
<script>
    const el = document.getElementById('canvas')
    //画布对象
    const ctx = el.getContext('2d')
    //填充样式
    ctx.fillStyle = 'red'
    //文字大小与字体设置
    ctx.font = '30px CascadiaMono'
    //定义文字基线
    ctx.textBaseline = 'top'
    //文字居中
    ctx.textAlign = 'center'
    ctx.fillText('houdunren.com@向军老师', 10, 250)
</script>
激变文字

<canvas id="canvas" width="500" height="500"></canvas>
<script>
const el = document.getElementById('canvas')
//画布对象
const ctx = el.getContext('2d')
//定义渐变的开始与结束坐标
const gradient = ctx.createLinearGradient(0 , 0, 500, 500)
// 定义渐变位置与颜色,参数一为位置是从 0~1 之间,参数二为激变颜色
gradient.addColorStop(0, '#1abc9c')
gradient.addColorStop(0.5, '#9b59b6')
gradient.addColorStop(1, '#f1c40f')
//渐变填充
ctx.strokeStyle = gradient
//文字大小与字体设置
ctx.font = '30px CascadiaMono'
ctx.strokeText('houdunren.com@向军老师', 10, 250)
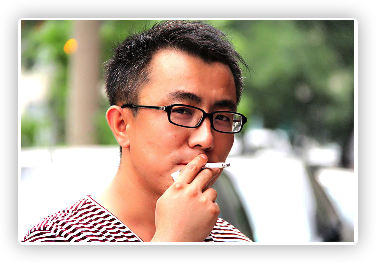
</script>图片填充
下面掌握将图片填充到画布
参数说明
| 参数 | 描述 |
|---|---|
| image | 规定要使用的图片、画布或视频元素。 |
| repeat | 默认。该模式在水平和垂直方向重复。 |
| repeat-x | 该模式只在水平方向重复。 |
| repeat-y | 该模式只在垂直方向重复。 |
| no-repeat | 该模式只显示一次(不重复)。 |
示例代码

<!-- 画布元素 -->
<canvas id="canvas" width="600" height="600"></canvas>
<script>
    const el = document.getElementById('canvas')
    //画布对象
    const ctx = el.getContext('2d')
    //创建图片对象
    const img = new Image()
    img.src = 'icon.jpeg'
    //图片加载后处理
    img.onload = () => {
        //第二个参数:"repeat|repeat-x|repeat-y|no-repeat"
        const pat = ctx.createPattern(img, 'repeat')
        //指定填充方式为贴图
        ctx.fillStyle = pat
        //开始填充
        ctx.fillRect(0, 0, 600, 600)
    }
</script>
图片缩放
下面将图片直接绘制到画布上。
<!-- 画布元素 -->
<canvas id="canvas" width="600" height="300"></canvas>
<script>
const el = document.getElementById('canvas')
//画布对象
const app = el.getContext('2d')
//创建图片对象
const img = new Image()
img.src = 'icon.jpeg'
//图片加载后处理
img.onload = () => {
el.width = img.naturalWidth * scale(img, el)
el.height = img.naturalHeight * scale(img, el)
//绘制图片
app.drawImage(img, 0, 0, el.width, el.height)
}
//取最小缩放比例
function scale(img: HTMLImageElement, el: HTMLCanvasElement): number {
return Math.min(el.width / img.naturalWidth, el.height / img.naturalHeight)
}
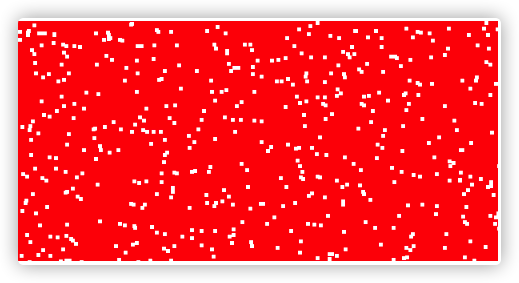
</script>绘制像素
下面是绘制像素点的示例
<!-- 画布元素 -->
<canvas id="canvas" width="600" height="300"></canvas>
<script>
const el = document.getElementById('canvas')
//画布对象
const ctx = el.getContext('2d')
//画布填充为红色
ctx.fillStyle = 'red'
ctx.fillRect(0, 0, el.width, el.height)
//向画出中绘制点
for (let i = 0; i < 1000; i++) {
//随机生成坐标
const x = Math.floor(Math.random() * el.width)
const y = Math.floor(Math.random() * el.width)
//绘制 5x5 白块
ctx.rect(x, y, 5, 5)
ctx.fillStyle = '#fff'
ctx.fill()
}
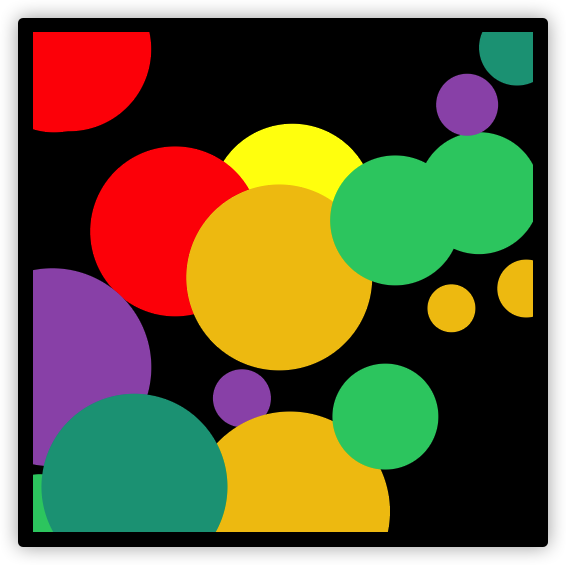
</script>绘制不规则
<!-- 画布元素 -->
<canvas id="canvas" width="500" height="500" style="overflow: hidden; border: solid 20px #000"></canvas>

<script>
    const el = document.getElementById('canvas')
    //画布对象并填充为黑色
    const app = el.getContext('2d')!
    app.fillStyle = '#000'
    app.fillRect(0, 0, el.width, el.height)

    //向画出中绘制点
    for (let index = 0; index < 20; index++) {
      app.beginPath()
      //随机设置绘制位置
      //随机设置圆的半径
      app.arc(Math.random() * el.width, Math.random() * el.height, 5 + Math.floor(Math.random() * 100), 0, 2 * Math.PI)

      //随机设置填充颜色
      app.fillStyle = ['yellow', 'red', '#16a085', '#2ecc71', '#f1c40f', '#9b59b6'].sort(() => {
        return Math.floor(Math.random() * 3) ? 1 : -1
      })[0]
      app.fill()
    }
</script>
黑板实例
下面我们为开发个小黑板功能,可以在上面写字并可以生成截图。
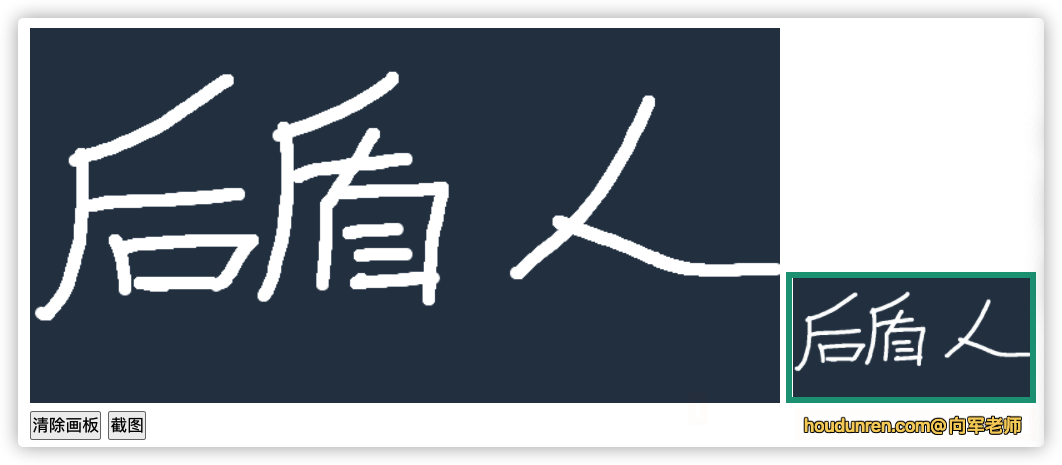
以下是使用 typescript 编写,如果你没有 ts 环境,请删除代码中的类型声明。
class Draw {
  constructor(
    public width: number,
    public height: number,
    public el = document.querySelector<HTMLCanvasElement>('#canvas')!,
    public app = el.getContext('2d')!,
    public btns = el.insertAdjacentElement('afterend', document.createElement('div'))!
  ) {
    this.el.width = this.width
    this.el.height = this.height
    this.setBackground()
    this.event()
  }

  //事件绑定
  private event() {
    //bind会返回新函数,addEventListener与removeEventListener要使用相同函数
    const callback = this.drawEventCallback.bind(this)

    this.el.addEventListener('mousedown', () => {
      //重新画线
      this.app.beginPath()
      //鼠标移动事件
      this.el.addEventListener('mousemove', callback)
    })

    //鼠标抬起时移除事件
    this.el.addEventListener('mouseup', () => this.el.removeEventListener('mousemove', callback))
    return this
  }

  //黑板写字的事件回调函数
  private drawEventCallback(event: MouseEvent) {
    this.app.lineTo(event.offsetX, event.offsetY)
    this.app.strokeStyle = 'white'
    this.app.stroke()
  }

  //截图
  public short() {
    const bt = document.createElement('button')
    bt.innerText = '截图'
    this.btns.insertAdjacentElement('beforeend', bt)
    const img = new Image()
    this.el.insertAdjacentElement('afterend', img)

    bt.addEventListener('click', () => {
      //使用canval标签的toDataURL方法,获取图片数据内容
      img.src = this.el.toDataURL('image/jpeg')
      img.style.cssText = 'width:300px;position:absolute;bottom:50px;right:0;border:solid 10px white;left:50%;transform:translateX(-50%);'
    })
    return this
  }

  //清屏
  public clear() {
    const bt = document.createElement('button')
    bt.innerText = '清屏'
    this.btns.insertAdjacentElement('beforeend', bt)
    bt.addEventListener('click', () => {
      this.app.fillStyle = '#000'
      this.app.fillRect(0, 0, this.el.width, this.el.height)
    })
  }

  //初始背景为黑色
  private setBackground() {
    this.app.fillStyle = '#000'
    this.app.fillRect(0, 0, this.el.width, this.el.height)
  }
}

const blackboard = new Draw(800, 300)
blackboard.short()
blackboard.clear()